Massive sending of Emails with Excel
It may happen that you have to send your customers or suppliers some e-mails with customized text depending on the recipient, or with a different attachment for each recipient.
Think about sending declarations of intent, or declarations of origin, or sending personalized invitations for participation in an event, or certificates of participation, greeting cards, and much more!
If you don’t have CRM software that allows you to automate all of this, don’t worry! you can do it with Excel!
In quesIn this article I’ll explain how to do it.
The shopping list
You just need three things:
- Microsoft Office (Excel or Access) with VBA enable.
- blat, a very powerful command line program capable of sending emails with the STMP protocol
- a mail server for maximum sending, such as free SMTP2GO. Alternatively, if you don’t have a lot of emails, you can also use your corporate mail server.
The basic idea
Microsoft Office is a truly wonderful package that a company cannot miss. The strength of this suite of tools (in particular Excel and Access) is the ability to write VBA (Visual Basic for Application) code and create incredible automations with it not only for data processing within them, but also for processing. integration with the Operating System and other external tools.
Personally, I have done everything with it: from systems for factory data acquisition, to interfacing with PLCs, to controls for electronic scales, to systems for controlling industrial furnaces, marking systems, presses and much more! VBA lends itself to many uses, so why not also use it to send e-mails?
Starting from now I will only talk about Excel because it is more known and easier to use, but it can also be extended to Access.
The idea is to then use a VBA macro in Excel to send the e-mails.
However, Excel alone cannot send e-mails but it can call an external command that can do it for it. this command will be blat, a program capable of sending commands for sending electronic mail to a mail server.
But let’s proceed step by step.
First, however, I want to remind you that sending emails without the prior consent of the interested parties can lead to various “privacy” disputes, making us the possible target of two different types of actions: one of an administrative nature (to be proposed before the Privacy Guarantor), and the other of a judicial nature, in order to obtain any compensation for damages. I therefore recommend that you use what I am about to explain only to send to your customers / suppliers and not to acquire new customers.
Creating a free account on SMTP2GO
This step is optional but highly recommended by me. Sending many “massive” emails using your company mail server in fact exposes you to the risk of losing the good reputation of your server, and ending it up in some “black list” by marking it as the server that sends SPAM, with the consequent blocking of the possibility of delivering normal messages. Mail servers do not like receiving SPAM, and are “trained” to try to recognize abuse, and to defend themselves.
For this reason we will use a specially created server, behind which there is someone who takes care to keep the reputation “clean”. A second reason for doing this is that doing so will lighten the workload on our server.
Visit www.smtp2go.com and sign up for a FREE plan. The service is free with a limit of 1000 emails per month.
If you need more monthly mailings here www.smtp2go.com/pricing/ you can find the various plans and their prices: from 10k, 40k, 100k, 250k, 500k, 1Milion and over 3 Million emails per month.
Creating a “sender” user
First we tell SMTP2GO what will be the e-mail address that will appear as the sender of the e-mails.
To do this we need to create an SMTP user.
After registering, go to Settings –> SMTP Users
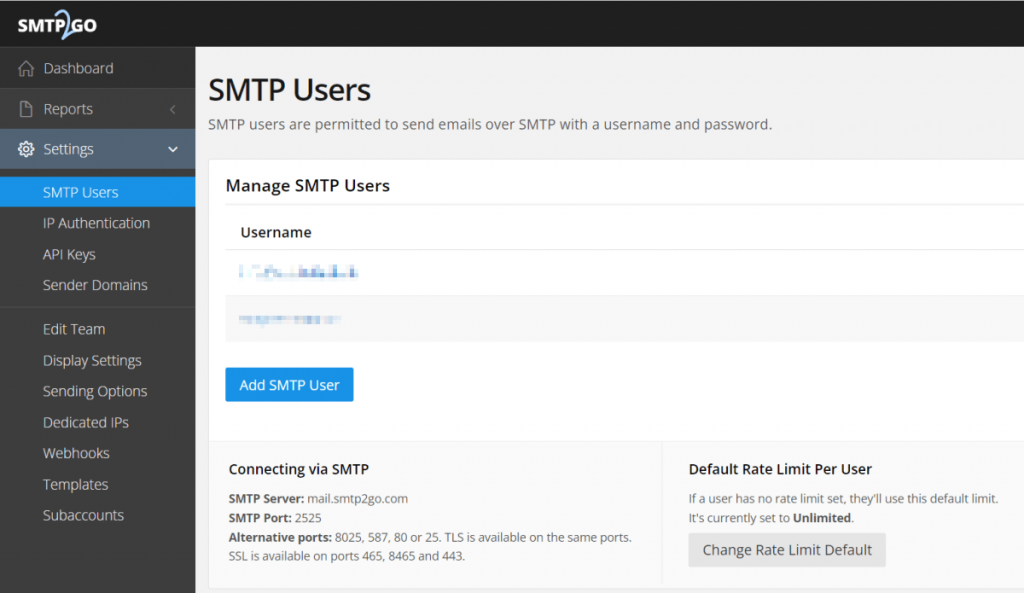
Now write down the data you see under “Connecting via SMTP”, we will need them later:
Connecting via SMTP
SMTP Server: mail.smtp2go.com

SMTP Port: 2525
Alternative ports: 8025, 587, 80 or 25. TLS is available on the same ports.

SSL is available on ports 465, 8465 and 443.
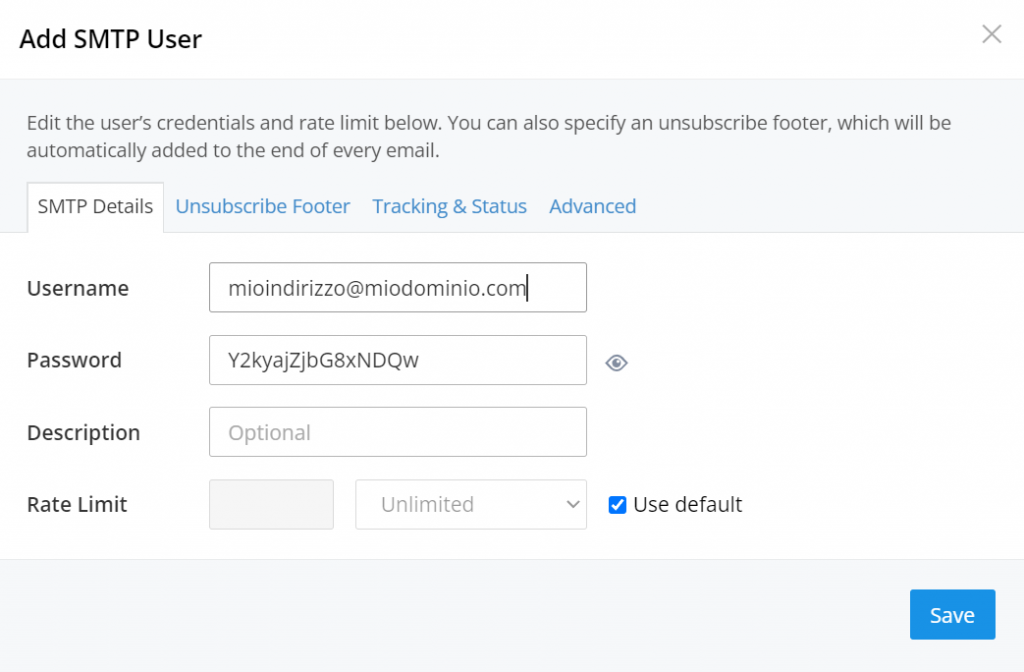
Create the first user for sending, click on the button Add SMTP User
and fill in Username with the email address of your company with which you want the mitten to appear
Choose an arbitrary password; it doesn’t have to be the real one of your sender mailbox. write it down.
Click on SAVE
Help me support this blog
If you want you can help me concretely to support this blog. You can do it with a free donation, by credit card or paypal. I will be grateful to you.
Authorize SMTP2GO to send on behalf of your domain
ATTENTION: If you prefer to use your company server instead of SMTP2GO, this step is not necessary. Otherwise if you use SMTP2GO it is very likely that the emails will not be accepted by the recipient servers.
To make recipients’ mail servers willingly accept our emails, we need to authorize SMTP2GO to send emails on behalf of our domain. This is done in four steps:
1. Add the domain we want to ship to
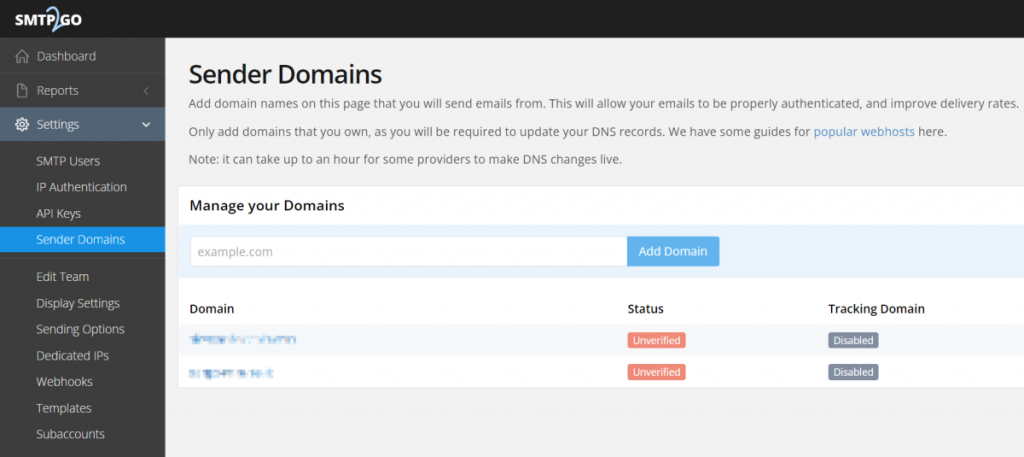
Go to Settings–>Sender Domains
type in the domain of your company and click on“Add Domain“
2. Publish some “CNAME” type records in our DNS
Now click on the domain you just entered, a window will appear with the list of CNAME records
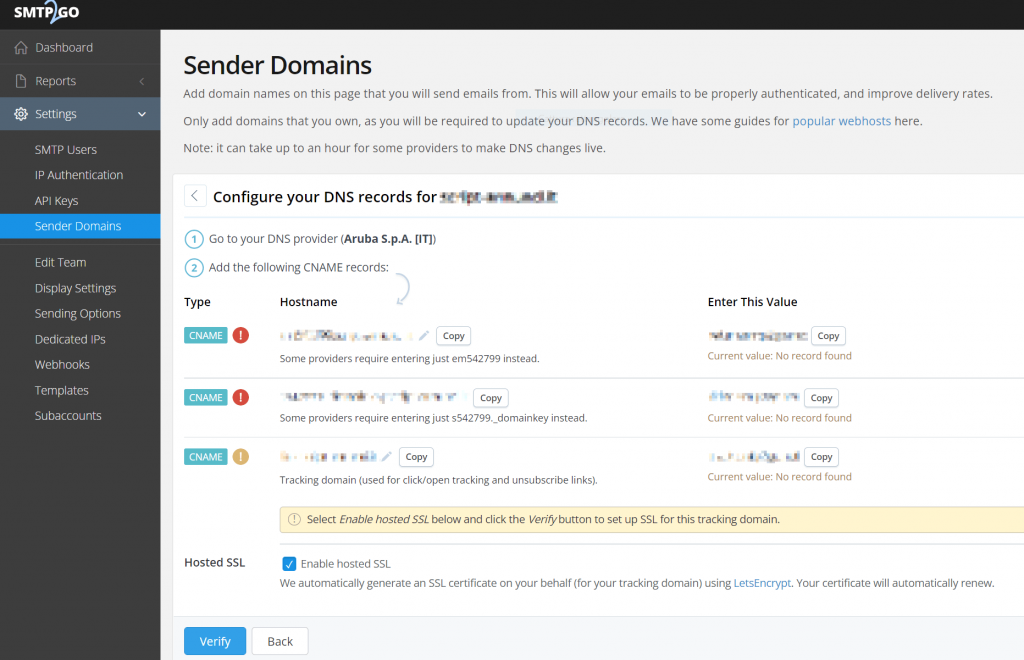
3. Enter the CNAME records shown
Now go to the DNS management of your domain and enter all the CNAME records indicated in the previous screen, with the relative values. Remove the configuration and wait at least 10 minutes. Note: It may take several hours for DNS to propagate globally.
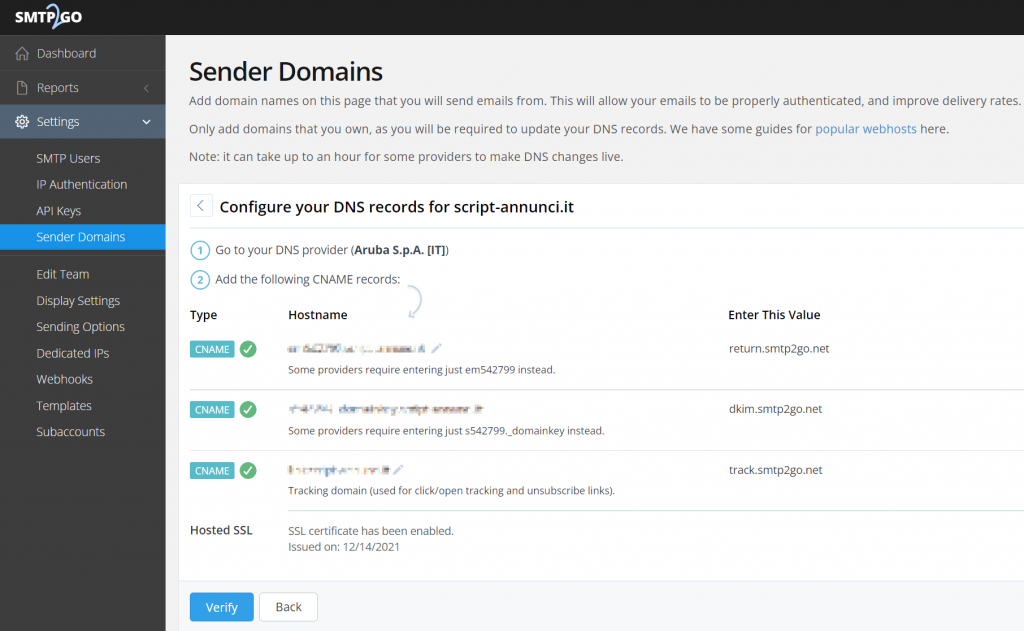
4. Check the DNS records
Now go back to the SMTP2GO “Configure your DNS” page and click on the “Verify” button. SMTP2GO will keep reading those records in the DNS effectively validating the configuration.
When the DNS has propagated and if the records have been entered correctly, green ticks appear indicating that the configuration is OK! SMTP2GO configuration is finished.
Installation and configuration of “blat”
Download blat Full Version from this link
Inside the downloaded compressed archive you will find a first folder and then a second one called “full” inside. Unzip the “blat.exe” and “blat.dll” files in the C: \ Windows \ System32 folder. By doing so, we guarantee blat the possibility of being able to be called from any local path.
Here is the hardest part. you must instruct BLAT to send the emails by telling him:
- with which email we send
- what is the server for sending
- with which codes (username and password) to connect to the server for sending
Open a Command Prompt like this: press the Win + R keys and in the window that appears type “cmd”. then press ENTER
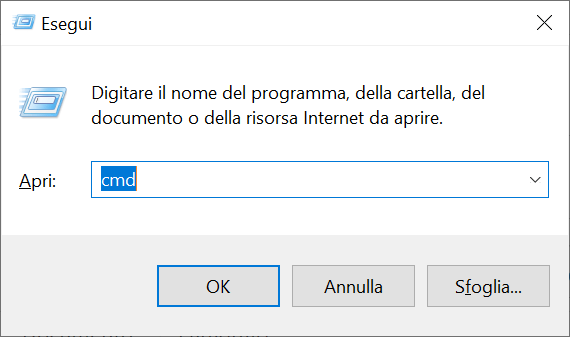
The Windows Command Prompt window opens. first, type: blat and press ENTER.
and something like this appears below it means blat is callable correctly.

Configure blat with the following command:
blat -install -f <sender-email> -server <email-server> -u <login> -pw <password>which will actually become:
blat -install -f MYEMAIL@MYDOMAIN.COM -server mail.smtp2go.com -u USERNAME-pw PASSWORD
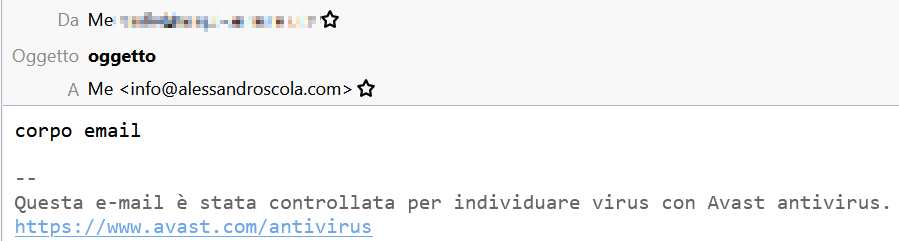
sent a test email to verify that everything is ok:
blat -s "My Subject" -body "my body" -to recipient@domain.com -html
obviously replace recipient@domain.com with your email!
the last “-html” parameter forces the content to HTML otherwise it will come in plain text only.
if everything went as it should, you will receive an email like this
Send emails with Excel
I have prepared a ready-made Excel sheet for you but that you can customize at will and that manages both needs:
- being able to customize the text of the email based on the recipient (inserting the values in different columns)
- to be able to send a different attachment for each recipient (by specifying the attachment name in an Excel column)
Download the Zip archive I have prepared for you from this link: https://github.com/alessandroscola/mass-sending-of-e-mails-with-excel
Unpack it in your PC’s “Documents” folder.
You will find inside:
- the Excel file with the macro
- 3 sample PDF attachments: 001.pdf, 002.pdf, 003.pdf
Open the Excel sheet, it looks like this:
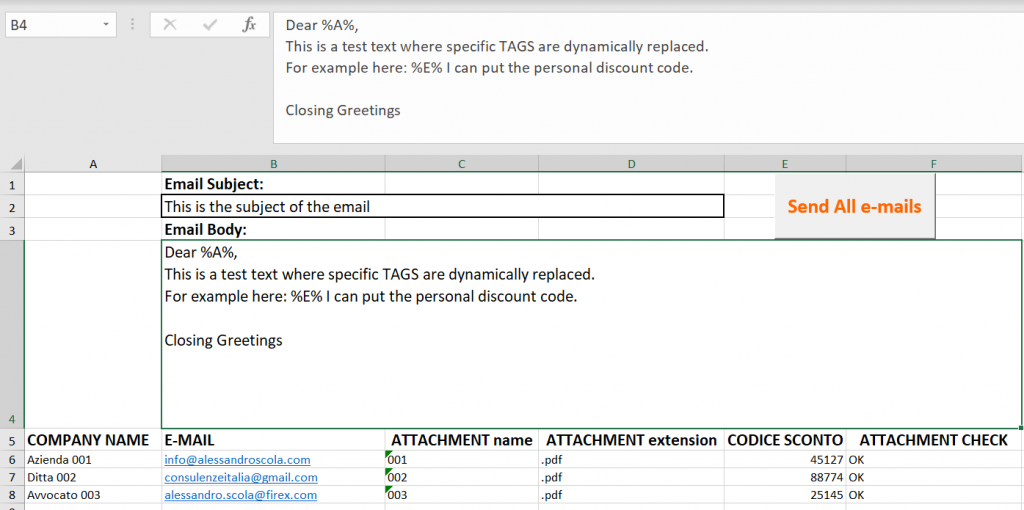
Compila l’OGGETTO della mail e il TESTO. Per il testo ti ricordo che per inserisce gli “a capo” devi premere ALT+INVIO.
Fill in the SUBJECT of the email and the BODY. For the text I remind you that to insert new lines you have to press ALT + ENTER.
Then from line 6 fill in the following fields.
In column A write the COMPANY NAME of the recipient. In column B write the MAIL.
In columns C and D write the name of the file separating NAME and EXTENSION. This allows you to focus only on the name. For example, the name of the attachment could coincide with the CUSTOMER CODE / SUPPLIER CODE (perhaps extrapolated from your management system) while the extension can always be the same (for example “.pdf” or “.docx” or other …).
It will then be your responsibility to save in the same folder as the excel file, all the attachments to be sent, with the correct names (eg 001.pdf 002.pdf 003.pdf) following the customer / supplier code.
In column E I have entered a hypothetical “discount code” that will be inserted in the TEXT of the email in place of the% E% tag.
To send everything, click on the “Send” button
The macro is executed and for each row starting from row 6, the text will be customized with the values of columns A and E.
Then the email will start with “Dear “<YOUR REAL COMPANY NAME indicated in column A>”
Similarly, the discount code will be inserted instead of% E%.
Furthermore, for each indicated attachment, its real existence will be verified in the folder where the Excel file is present. If the file exists then it will be attached, otherwise the email will be sent without the attachment.
In column F “ATTACHMENT CHECK” will be written “Ok” if the attachment has been found, or the message: “ATTENTION: ATTACHMENT NOT FOUND!” if not.
Customize the VBA code
The macro is simple to understand. You can customize it at will.
Option Explicit
Public conn, rs As Object

' Code by Alessandro Scola www.alessandroscola.com
'
' Rimbember for INSTALL BLAT:
' blat -install -f <sender-email> -server <email-server> -u <login> -pw <password>
'
' To SEND with BLAT:
'   blat -Subject "email Subject" -body "email body" -to recipient@domain.xxx -html
'
'   alternatively with the email body in a external file "email_body.txt", the command is:
'   blat -s "c:\path\to\email_body.txt" -Subject "email Subject" -to recipient@domain.xxx -attach "c:\path\to\attachment.pdf" -html

Sub send_emails()
Dim row As Long
Dim RetVal As Variant
Dim email As String
Dim command As String
Dim obj_fso As Object
Dim fileName As String
Dim subject As String
Dim body As String

RetVal = MsgBox("Are you sure you want to send all emails ?", vbQuestion + vbYesNo + vbDefaultButton2)
If (RetVal <> vbYes) Then
  Exit Sub
End If


subject = Trim(Cells(2, 2).Value)
subject = Replace(subject, Chr(34), "\" & Chr(34)) ' replaces any " character with a \" not to break the command string


row = 6

email = Trim(Range("B" & row).Value)

While (email <> "")
  body = Trim(Cells(4, 2).Value) ' the initial body text

  body = Replace(body, "%A%", Trim(Cells(row, 1))) ' replaces any %A% with the content of A column
  body = Replace(body, "%E%", Trim(Cells(row, 5))) ' replaces any %E%with the content of E column
  body = Replace(body, vbLf, "<br>") ' replaces any "new line" with the "<BR>" TAG. "<BR>" TAG work as "new line " in HTML e-mails
  body = Replace(body, Chr(34), "\" & Chr(34)) ' replaces any " character with \" to not to break the command string

  command = "blat.exe -Subject " & Chr(34) & subject & Chr(34) & " -body " & Chr(34) & body & Chr(34) & " -to " & email & " -html"
  fileName = ThisWorkbook.Path & "\" & Trim(Range("C" & row).Value) & Trim(Range("D" & row).Value)

  If (fileExists(fileName)) Then
     'Se il file allegato esiste aggiunge al command "BLAT" la parte di codice per allegarlo
     command = command & " -attach " & Chr(34) & fileName & Chr(34)
     Cells(row, 6).Value = "OK"
  Else
     'Altrimenti scrive alla colonna 6 un avviso !
     Cells(row, 6).Value = "ATTENTION: ATTACHMENT NOT FOUND!"
  End If
  RetVal = Shell(command, vbMinimizedFocus)

  Application.Wait (Now + TimeValue("0:00:1")) ' Pause for 1 second

  row = row + 1

  email = Trim(Range("B" & row).Value)
  fileName = ThisWorkbook.Path & "\" & Trim(Range("C" & row).Value) & Trim(Range("D" & row).Value)
Wend

row = row - 1
MsgBox "Program ended at row: " & row, vbInformation

End Sub

' Check if a file exists
Function fileExists(fileName As String) As Boolean

    Dim obj_fso As Object

    Set obj_fso = CreateObject("Scripting.FileSystemObject")
    fileExists = obj_fso.fileExists(fileName)
End Function
Automate everything and possible uses
If you are familiar with VBA you can take advantage of this system to automate the sending of some emails at specific intervals.
For example, it happened in the past to create a VBA program in Access that every month, at the beginning of the month, exported the time stamps of the attendance detector, and sent them via email in Zip format to the temporary administration agency. This is an example of how this solution can take away hours of work every month!
It is therefore sometimes worthwhile to spend some time on it, to be able to recover it later.
In those situations where you need to repeat a submission, it comes naturally to automate it. The solution described here is within everyone’s reach (Who doesn’t have Excel or Access in the company?).
If you chew on VBA you will be autonomous, even in customizing the solution, otherwise you will need a little help from your IT department.Help me support this blog
If you want you can help me concretely to support this blog. You can do it with a free donation, by credit card or paypal. I will be grateful to you.


